
Some teams need to lock Beautiful.ai behind their company's identity provider, and that's where SSO comes in. This walkthrough is for the admin or IT lead running setup. It covers the full flow: enabling SSO, verifying your domain through DNS, connecting your identity provider with a metadata URL, and the advanced options like IdP-initiated login, Strict SSO, and provisioning. By the end, your team will sign in through Okta, Entra ID, or OneLogin instead of managing passwords.
What SSO Does (and Who Sets It Up)
Single Sign-On (SSO) lets your team access Beautiful.ai through your organization's identity provider (IdP) instead of managing a separate Beautiful.ai password. If your company already uses Okta, Microsoft Entra ID (Azure AD), or OneLogin, this connects Beautiful.ai into that same login experience.
Once SSO is enabled, you get:
- Authentication through your IdP — users sign in with the company credentials they already have
- Centralized password management — passwords live in your organization, not scattered across SaaS tools
- Access control that matches your IT and security policies — Beautiful.ai falls in line with how you already govern access
- Streamlined onboarding and offboarding — adding or removing someone in your IdP can flow through to Beautiful.ai
This is a workspace-level setup that pays off across your whole team, and it's a one-time configuration rather than something each person handles themselves.
To note: Beautiful.ai connects to your identity provider using the SAML SSO protocol, one of the main standards enterprise SaaS apps support. Once it's connected, login can run two ways: SP-initiated (the user starts at Beautiful.ai and gets redirected to your IdP to authenticate) or IdP-initiated (the user logs into your IdP dashboard first, then launches Beautiful.ai from there). You don't have to pick one forever, both can be supported depending on your configuration.
Before Setting Up SSO
Make sure the right person is running this setup! SSO setup needs to be completed by someone who has all three of the following:
- Owner role in your Beautiful.ai team workspace — this is the only role that can configure SSO (more on this below)
- Administrator access to your identity provider (Okta, Entra ID, OneLogin, etc.)
- Access to your company's DNS records to complete domain verification
In most organizations the IdP and DNS pieces belong to a senior IT or security administrator.
Some things to note:
Don't start until you've confirmed DNS and IdP access. The two things that stall SSO setup more than anything else are not having access to your domain's DNS records (needed for domain verification) and not having admin rights in your identity provider (needed to pull the metadata). If you're not sure who owns those in your company, coordinate with your internal IT team before you begin. It saves you from starting the flow and getting stuck halfway.
-
Only Owners can set up SSO. Beautiful.ai has two admin-level roles in a team workspace: Owners and Librarians. Librarians are considered admins and can do a lot, but they cannot configure SSO. SSO setup is Owner-only.
This matters because the person doing the technical work is usually your identity provider admin (the IT or security person with IdP and DNS access), and they're often not in your Beautiful.ai workspace at all. You have two ways to handle that. You can either: Invite the IdP admin into the team workspace as an Owner so they can run the setup themselves, or pair them with an existing Owner who drives the Beautiful.ai side while the IdP admin handles the identity provider and DNS side.
Worried about license count if you add an IdP admin as an Owner? You don't have to keep them in the workspace forever. A common pattern: invite the IdP admin as an Owner just for setup, complete the SSO configuration together, then remove them from the team workspace afterward to free the seat back up. SSO stays configured once it's done, so removing the person who set it up doesn't undo the work.
Enabling SSO and Verifying Your Domain
Open the SSO configuration in your account settings
Sign in to Beautiful.ai as a workspace admin, then:
- Click your profile icon in the top-right corner.
- Select Manage Account from the pop-up menu.
- In the Manage Account menu, click Integrations in the left sidebar.
- Under Team integrations, click Enable SSO.
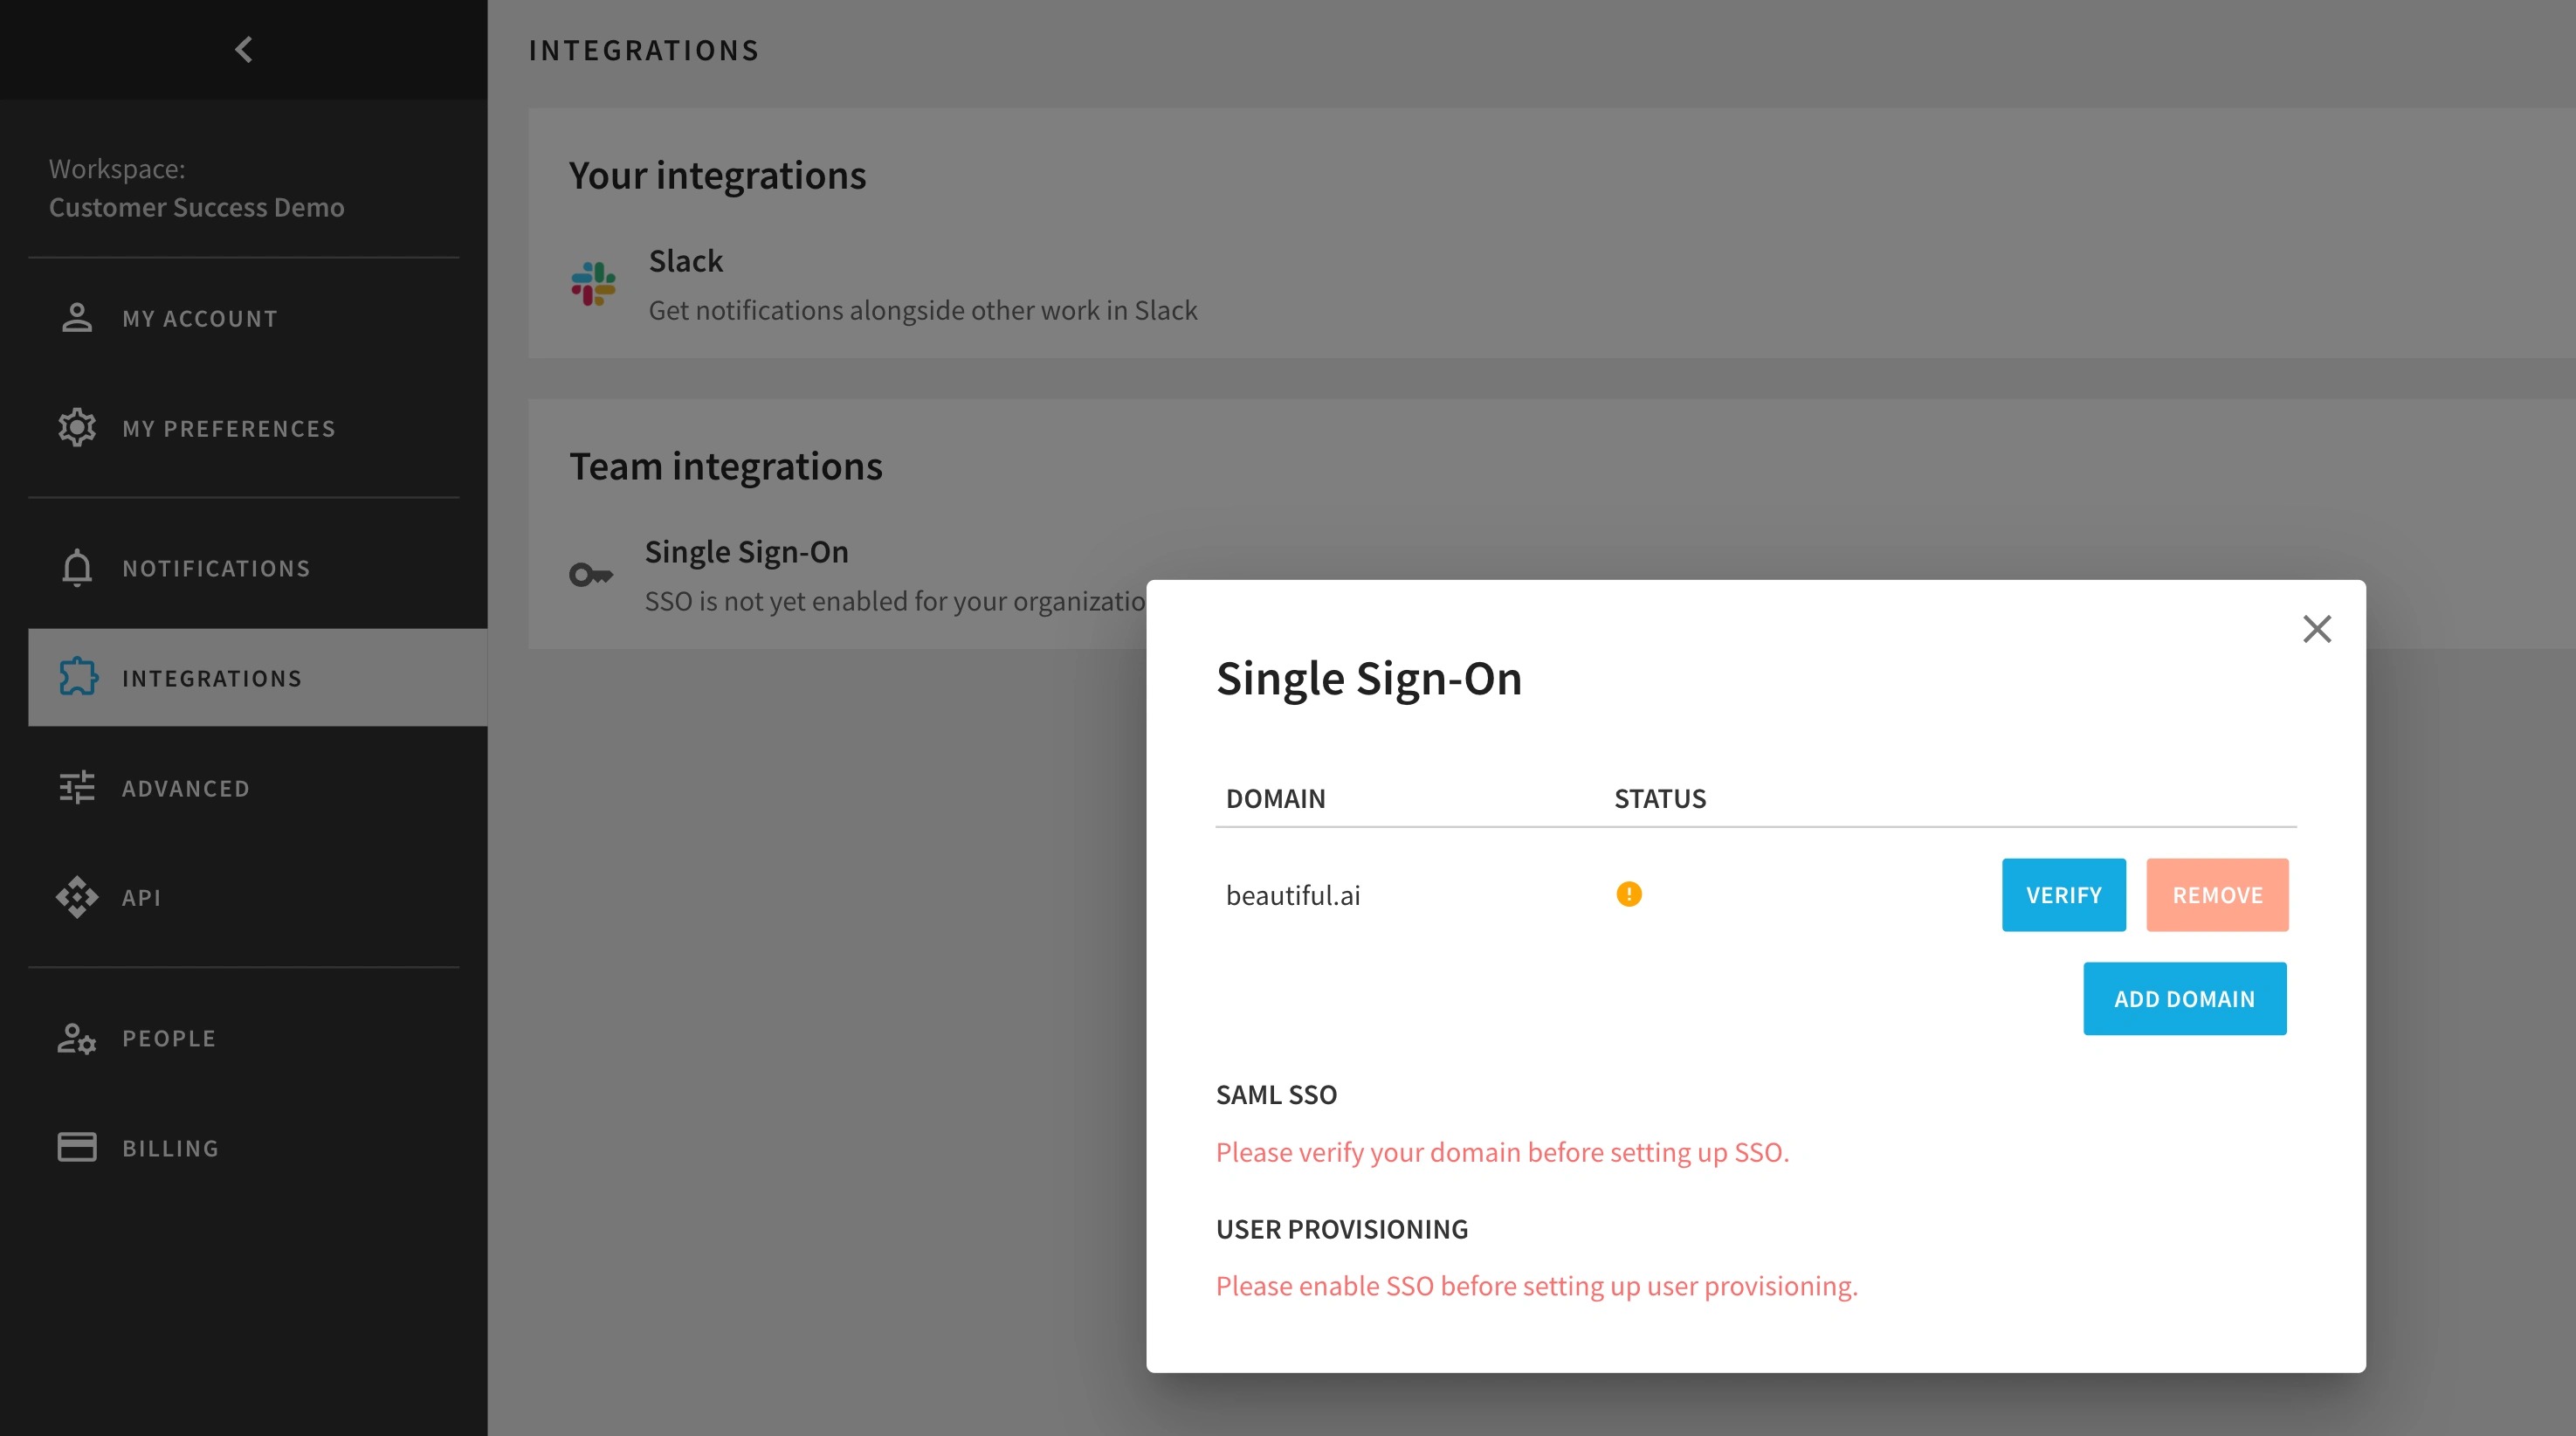
The SSO configuration window will open. This is where the entire setup lives, from verifying your domain to enabling SAML SSO to the user provisioning options we'll cover later. You'll notice the window guides you through in order: it won't let you set up SAML SSO until your domain is verified, and it won't let you set up user provisioning until SSO is enabled. That sequencing is intentional, and this guide follows the same path.
7. Add your domain to generate a verification key
Beautiful.ai requires domain verification before SSO can go live. This is how the platform confirms your organization actually owns the domain you're configuring (for example, yourcompany.com), and it's a standard requirement across SaaS platforms that support SSO.
In the Single Sign-On window, click ADD DOMAIN and enter your company's domain.
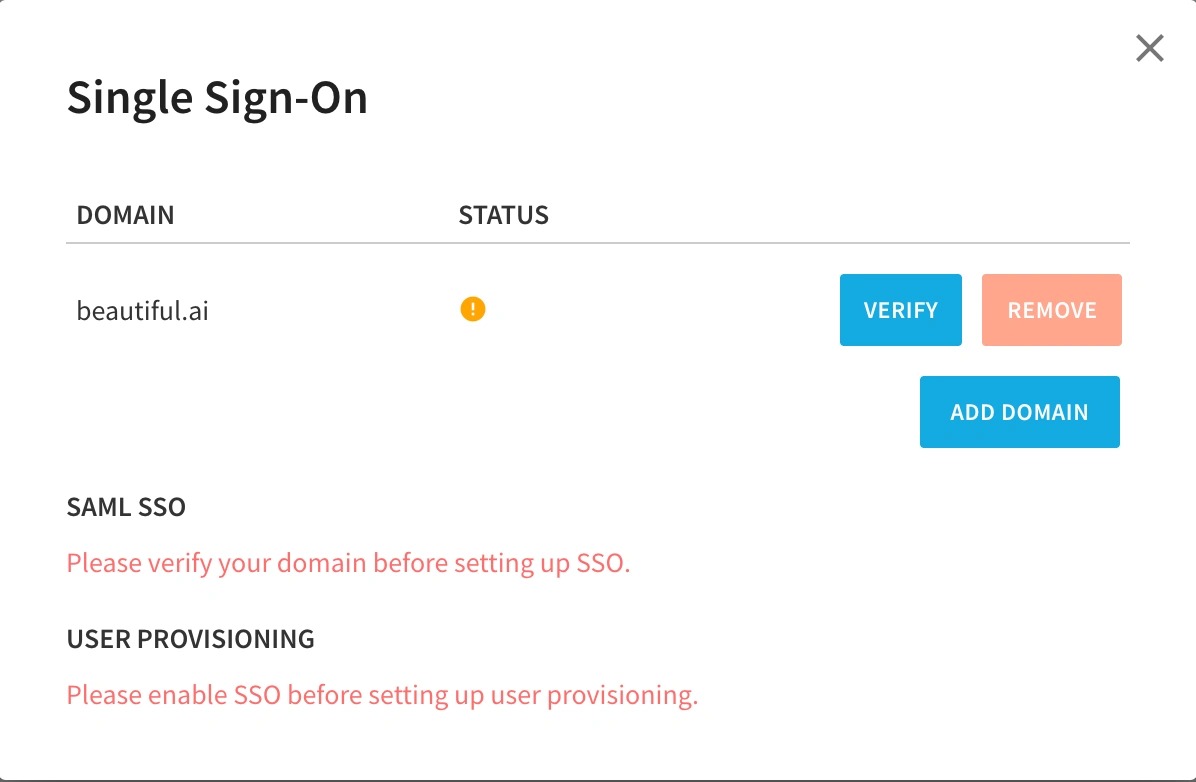
Once added, it appears in the DOMAIN list with a pending status (a small warning icon in the STATUS column) and a VERIFY button next to it.
To get your domain verification key, hover over the status icon next to your domain. A pop-up appears with everything you need for the DNS step: a short explanation that the domain isn't verified yet, the TXT record to add, and the Domain verification key itself (with a copy icon so you can grab it cleanly). You'll use this in the next step.
You may notice a
beautiful.aidomain already sitting in the list by default. You can ignore it or click REMOVE to clear it out, since the only domain that matters here is your own company's domain. Removing it keeps the list clean and avoids any confusion about which domain you're verifying.
8. Add the verification key to your DNS as a TXT record
Hand the verification key to whoever manages your DNS (or do it yourself if that's you). They'll need to:
- Open your domain's DNS settings
- Add a new TXT (Text) Record
- Leave the Name / Host / Alias field blank (this is called out directly in the verification pop-up)
- Paste the domain verification key as the record's value
- Publish the record
This is the step that confirms ownership of the domain to Beautiful.ai. If you don't have DNS access, this is the moment to bring in the person who does.
Note: DNS changes aren't always instant. Depending on your provider, a newly published TXT record can take anywhere from a few minutes to a bit longer to propagate. If verification doesn't succeed on your first check, give it a little time and try again before assuming something's wrong. The most common culprit when it does fail is a typo in the record, so double-check the key was pasted in exactly.
7. Click VERIFY to confirm domain ownership
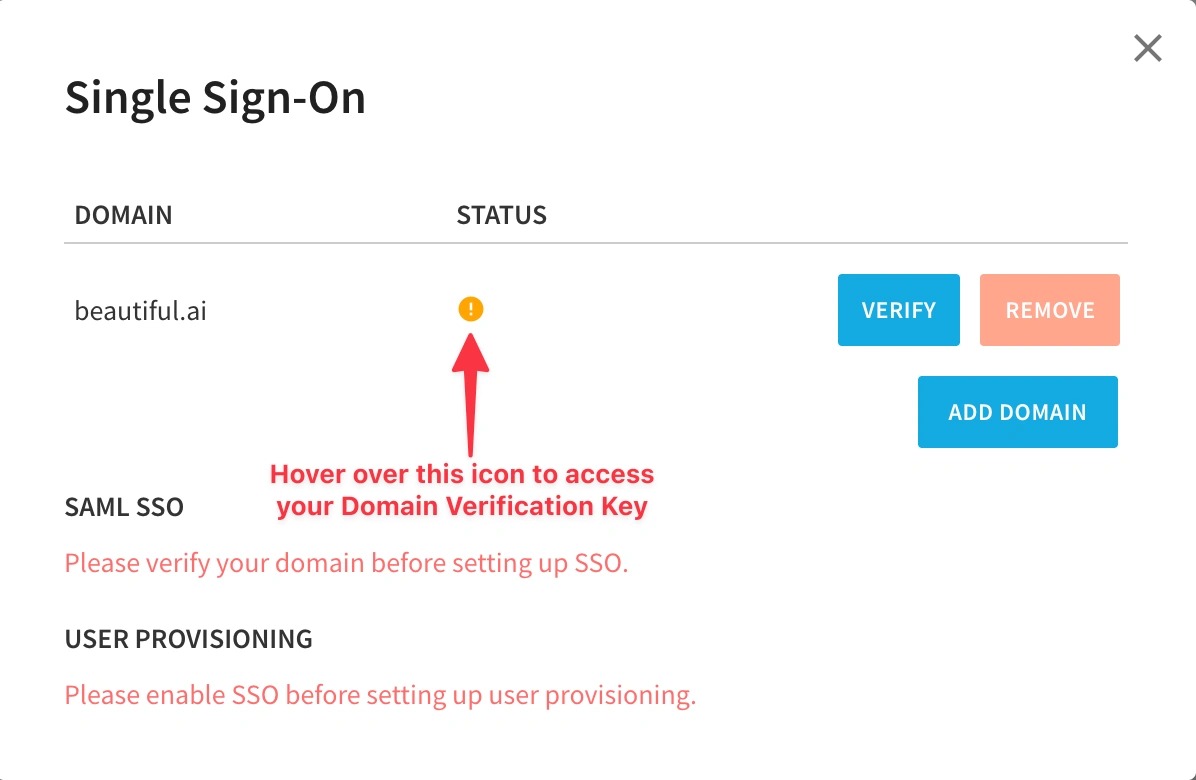
Once the TXT record is published, return to the Single Sign-On window and click VERIFY next to your domain. Beautiful.ai checks domain ownership against the record you added, and once it confirms, the pending status icon clears and the SAML SSO section unlocks. You've cleared the biggest hurdle in the whole process and you're ready to connect your identity provider.
Connecting Your Identity Provider
-
Configure Beautiful.ai as a SAML application in your IdP
Before you can grab a metadata URL, your IdP needs to know what it's pointing at. Head to your identity provider's admin console (Okta, Entra ID, OneLogin, or whichever you use) and create a new SAML application for Beautiful.ai. You'll need these three values from Beautiful.ai when configuring the app:
-
Entity ID:
https://www.beautiful.ai -
ACS URL:
https://www.beautiful.ai/api/sso/saml/consume -
User ID format:
email
Paste them into the matching fields in your IdP's SAML app setup, save the application, and you're ready to pull the metadata URL out of it in the next step.
To note: Different IdPs label these fields a little differently. "Entity ID" is sometimes called Audience URI, "ACS URL" might appear as Single Sign On URL, Reply URL, or Assertion Consumer Service URL, and "User ID format" usually shows up as NameID format. The values stay the same, only the field names change. The provider-specific guides at the end of this walkthrough show the exact field names for Okta, Entra ID, and OneLogin.
2. Locate and copy the metadata URL in your IdP
Switch over to your identity provider's admin console. Inside the Beautiful.ai application configuration there (or the equivalent SAML app you've set up), find the metadata URL and copy it.
The exact location of the metadata URL differs by provider, so if you're not sure where it lives, the provider-specific guides linked at the end of this walkthrough point you to the right spot in Okta, Entra ID, and OneLogin.
3. Paste the metadata URL into Beautiful.ai and parse it
Back in the Beautiful.ai SSO configuration:
- Paste the metadata URL into the SSO configuration settings
- Click Parse metadata
Once the metadata parses successfully, your core SSO configuration is complete. That's the heavy lifting done. Everything after this point is optional fine-tuning.
Advanced SSO Options
urn on IdP-Initiated Login (optional)
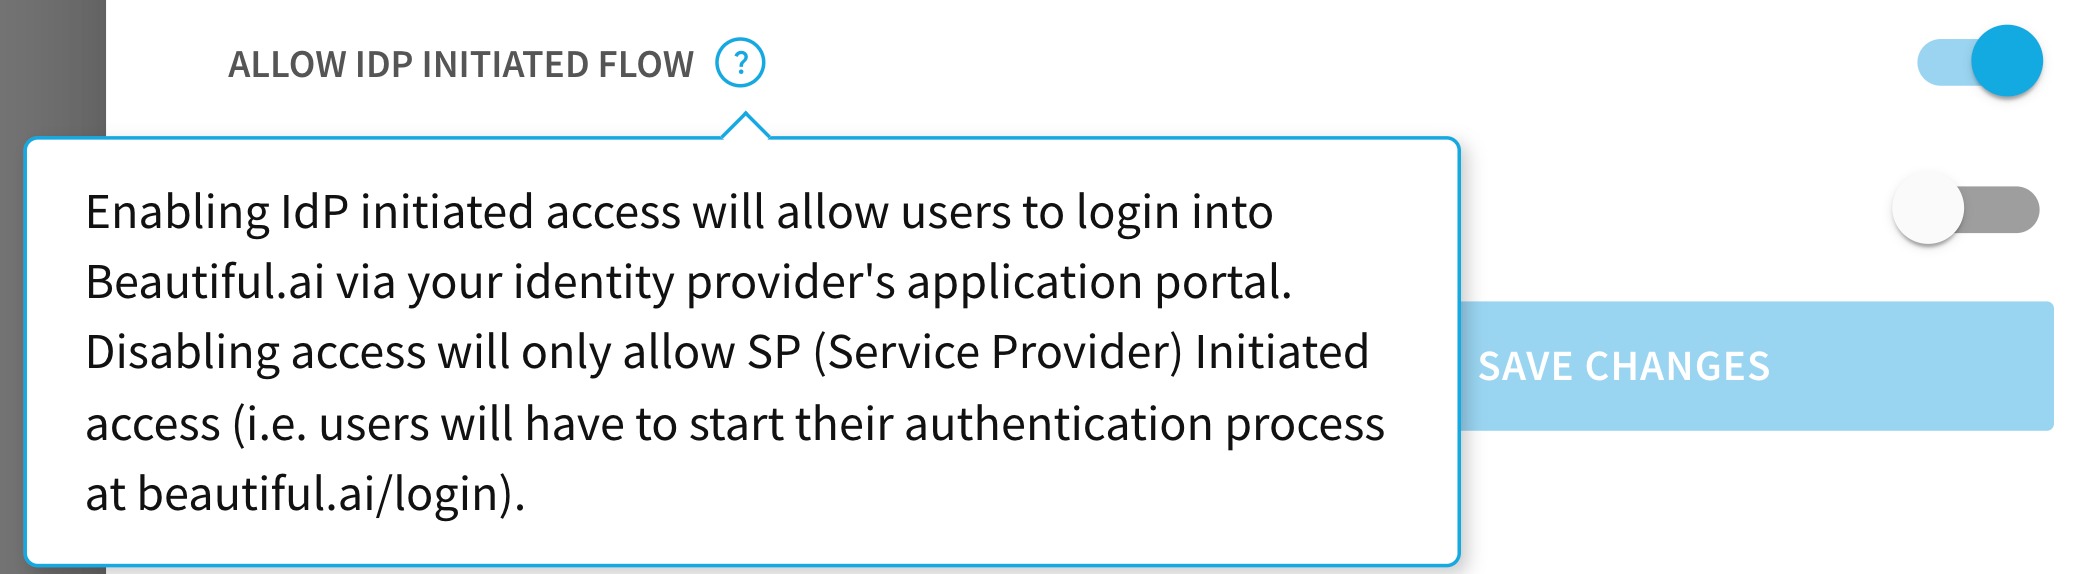
By default, users can start at Beautiful.ai and get redirected to your IdP to sign in (SP-initiated). If you'd also like users to be able to launch Beautiful.ai straight from their identity provider dashboard, enable the IDP initiated flow setting in the Beautiful.ai SSO configuration.
This is a nice convenience for teams that already live in their Okta or Entra dashboard all day, since it puts Beautiful.ai right alongside their other apps.
2. Enable Strict SSO (optional, but powerful)
Strict SSO prevents users from bypassing SSO by signing in with a password. With it on, everyone must authenticate through your identity provider, no exceptions. Turn it on using the enforce strict SSO setting in the SSO configuration.
This is the setting most security-conscious teams ultimately want, since it closes the password back door entirely.
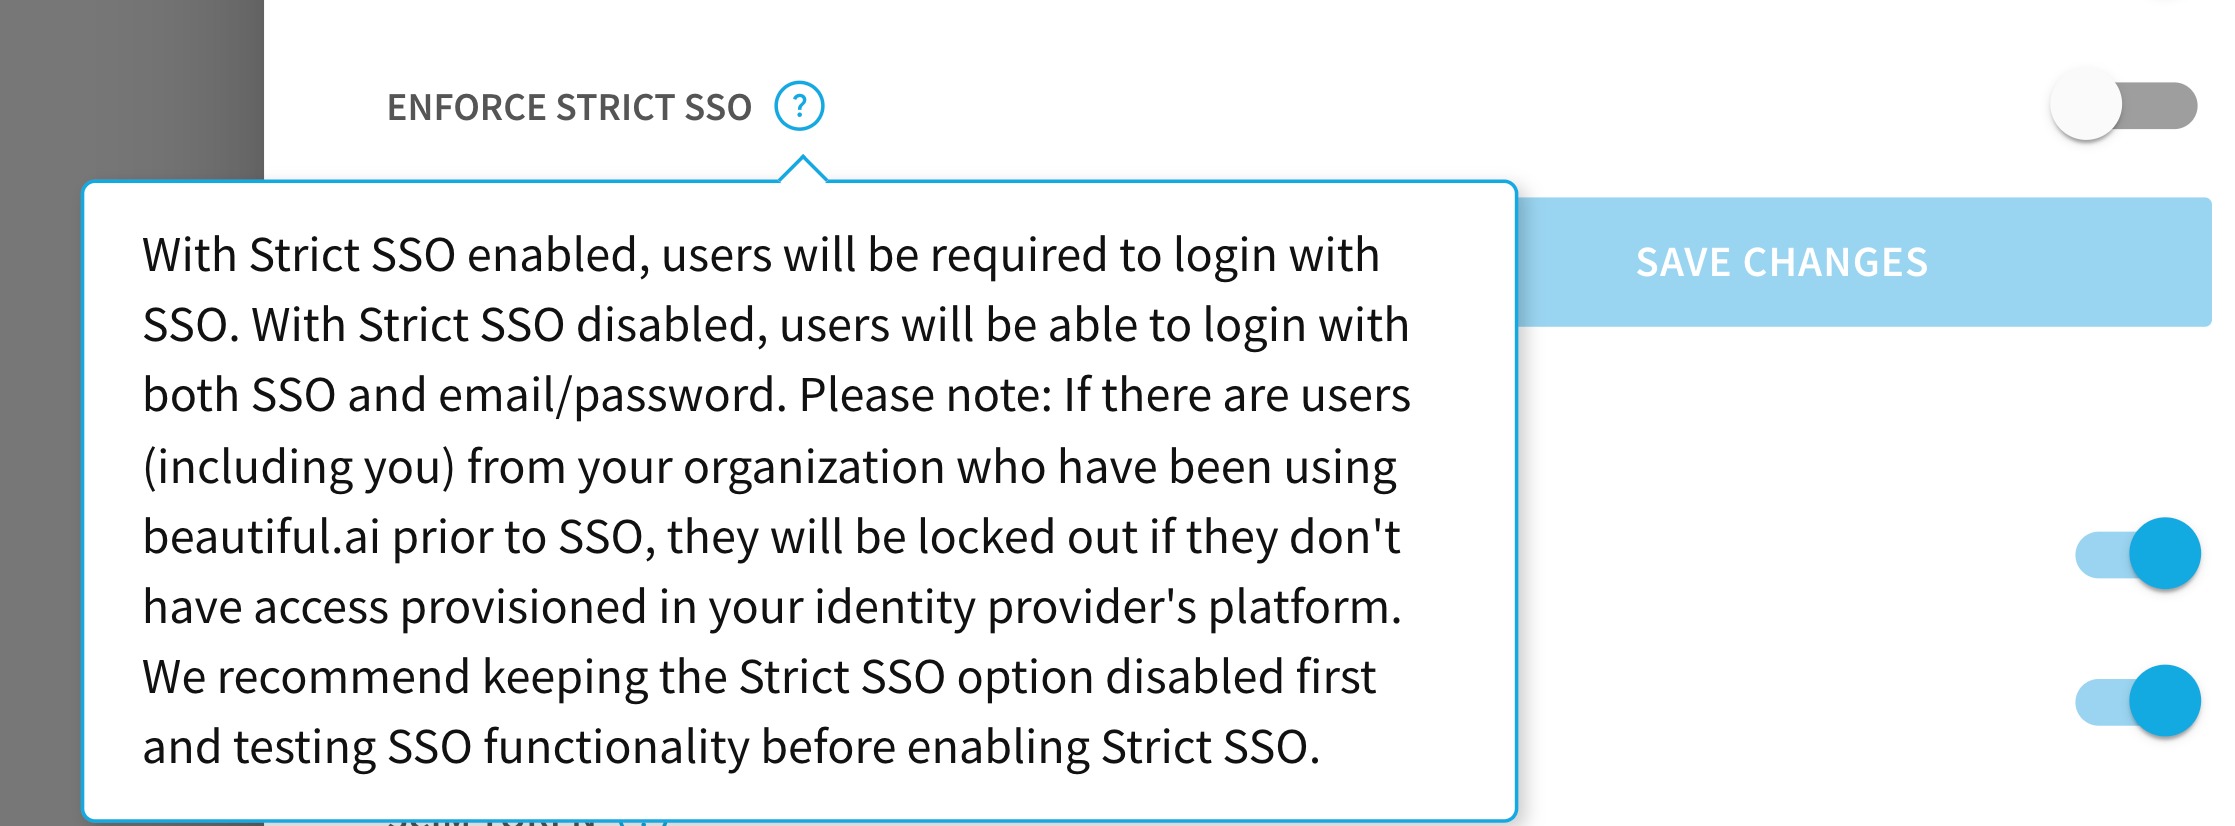
Don't enable Strict SSO until you've tested. Strict SSO removes the password fallback, so if anything in your configuration is slightly off, you can lock users out. The safe sequence is to validate that login works (both SP-initiated and IdP-initiated, if you're using both) before you enforce Strict SSO. We walk through that exact rollout order in Section 6.
3. Set up provisioning (JIT and SCIM)
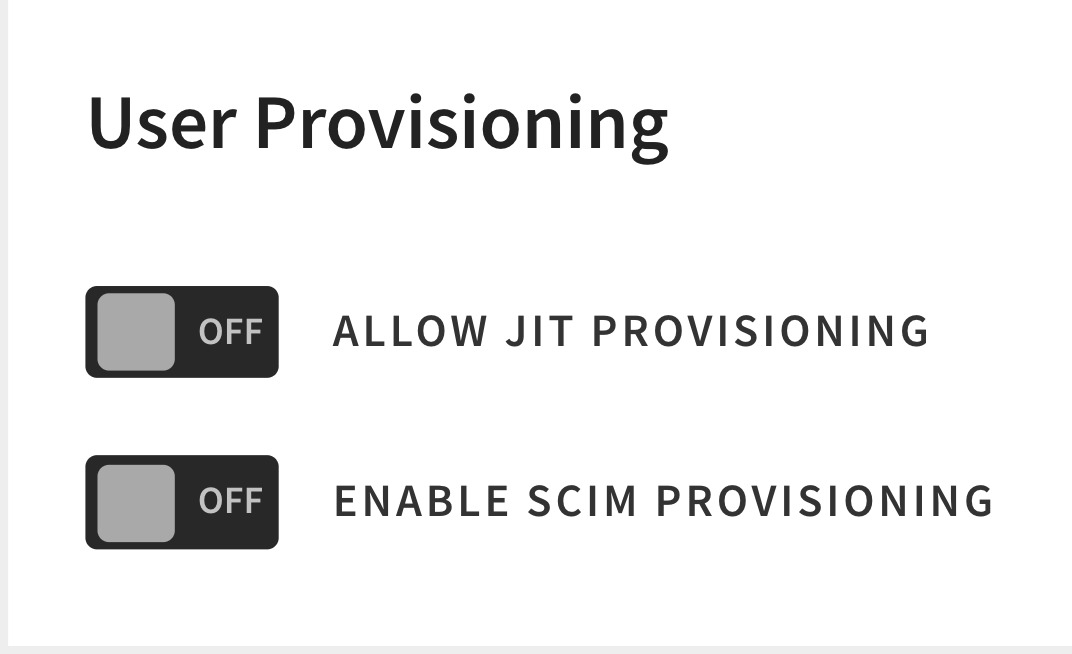
Once initial SSO setup is complete, provisioning settings become available in the SSO configuration view. These automate how user accounts get created and kept in sync. You have two options:
- Allow JIT Provisioning — automatically creates a Beautiful.ai account for anyone added to your IdP, and keeps your IdP directory in sync with Beautiful.ai for automatic on- and off-boarding.
- Enable SCIM Provisioning — uses the SCIM standard (System for Cross-domain Identity Management) to automate the exchange of user identities between your IdP and Beautiful.ai, reducing manual account creation and maintenance.
If you go the SCIM route, here are the details your IT team will need:
-
SCIM endpoint:
https://www.beautiful.ai/api/sso/scim/v2 - User ID format: email
- Supported actions: push new users, push profile updates (status and display name), and delete (deactivate) users
- Authentication: via bearer token
SCIM does not currently support groups. Beautiful.ai's SCIM implementation handles individual users (creating, updating, and deactivating them), but it does not sync groups. If your provisioning plan depends on group-based assignment, factor this in up front and talk to your CSM about the best approach for your setup.
Recommended Rollout Approach
The safest, lowest-stress way to bring SSO live is to phase it in rather than flipping everything on at once. We recommend:
- Configure SSO with a small test group first.
- Validate login behavior — confirm both SP-initiated and/or IdP-initiated flows work as expected.
- Enable Strict SSO only after successful validation, never before.
- Communicate the change to end users before you enforce SSO, so no one is surprised by a new login screen.
This order is the difference between a smooth cutover and a flood of "I can't log in" messages. Test small, validate, then enforce.
Give your team a heads-up before enforcement day. The most common friction with SSO rollouts isn't technical, it's the surprise. A short note to your team explaining that they'll soon sign in through Okta/Entra/OneLogin instead of their Beautiful.ai password (and what to do if they hit a snag) prevents almost all of the day-one confusion. Two sentences in a Slack channel goes a long way.
Troubleshooting
If SSO isn't working, check these first!
Most SSO issues trace back to a handful of usual suspects. Before reaching out, run through this list:
- Domain verification TXT record is correctly published in your DNS
- Metadata URL is accurate and accessible
- Metadata was successfully parsed in Beautiful.ai
- Email / NameID mapping matches your users' actual email addresses
If you do need support, please include these details in your email:
- The name of your identity provider
- Confirmation that domain verification is complete
- Screenshots of your IdP configuration
- The exact error message users are seeing
- Whether the issue is happening in the SP-initiated or IdP-initiated flow
- The timing of the last sign-in attempt, so support can locate the right logs
Additionally, before you configure things on the IdP side, grab the provider-specific guide that matches your identity provider. Each one walks through the exact configuration steps inside that provider's UI:
Comments
Article is closed for comments.